Volume Management
This guide shows you how to manage Docker Volumes in ReadyStackGo — from overview and details to creating and deleting volumes.
Overview
Section titled “Overview”ReadyStackGo provides centralized management for Docker Volumes per environment. You can monitor the persistent storage of your stacks and identify orphaned volumes.
| Feature | Description |
|---|---|
| Volume List | Display all Docker Volumes of the active environment |
| Orphaned Detection | Detect volumes without container references |
| Volume Details | View size, mountpoint, labels and referencing containers |
| Create Volume | Create new volumes with name and optional driver |
| Delete Volume | Remove individual or all orphaned volumes |
| Orphaned Filter | Filter the list to show only orphaned volumes |
Step by Step: Managing Volumes
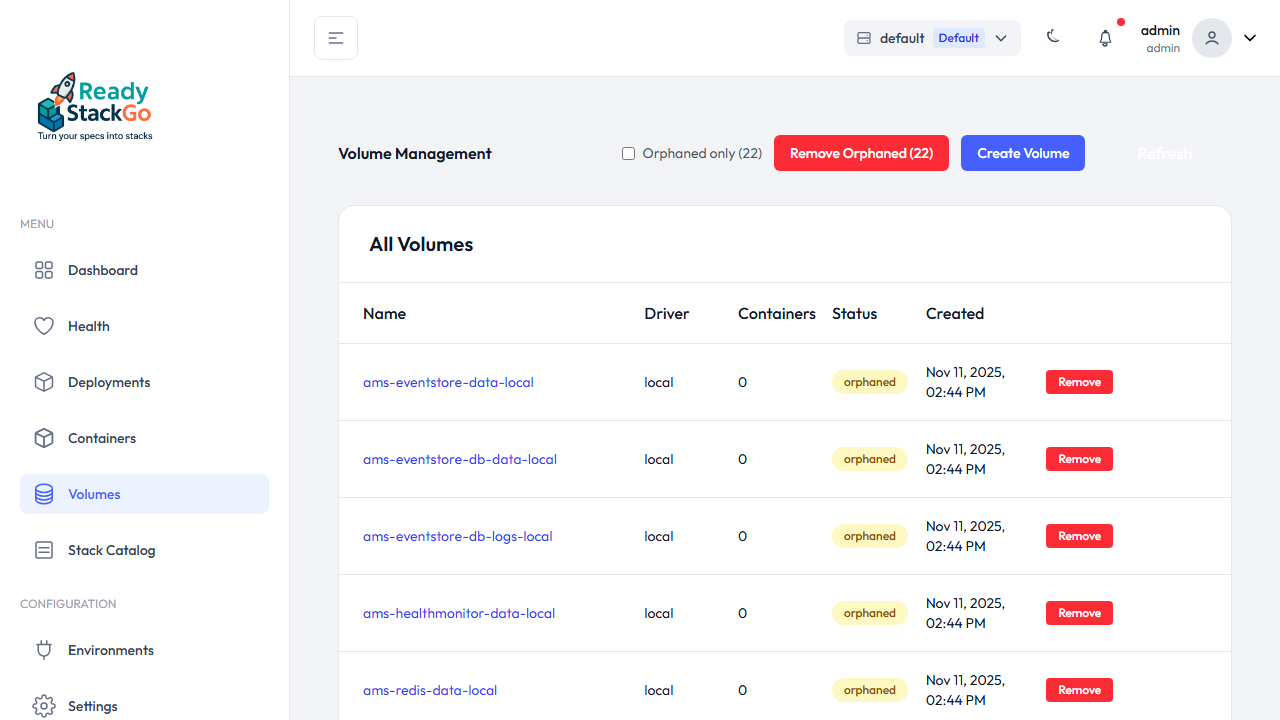
Section titled “Step by Step: Managing Volumes”Step 1: Open the Volumes Page
Section titled “Step 1: Open the Volumes Page”Navigate to Volumes in the sidebar. The page displays all Docker Volumes of the active environment in a table with name, driver, container count, status and creation date.
Step 2: Create a Volume
Section titled “Step 2: Create a Volume”Click Create Volume to reveal the creation form. Enter a Volume Name and optionally a Driver (default: local).

Click Create to provision the volume. It will then appear in the list.

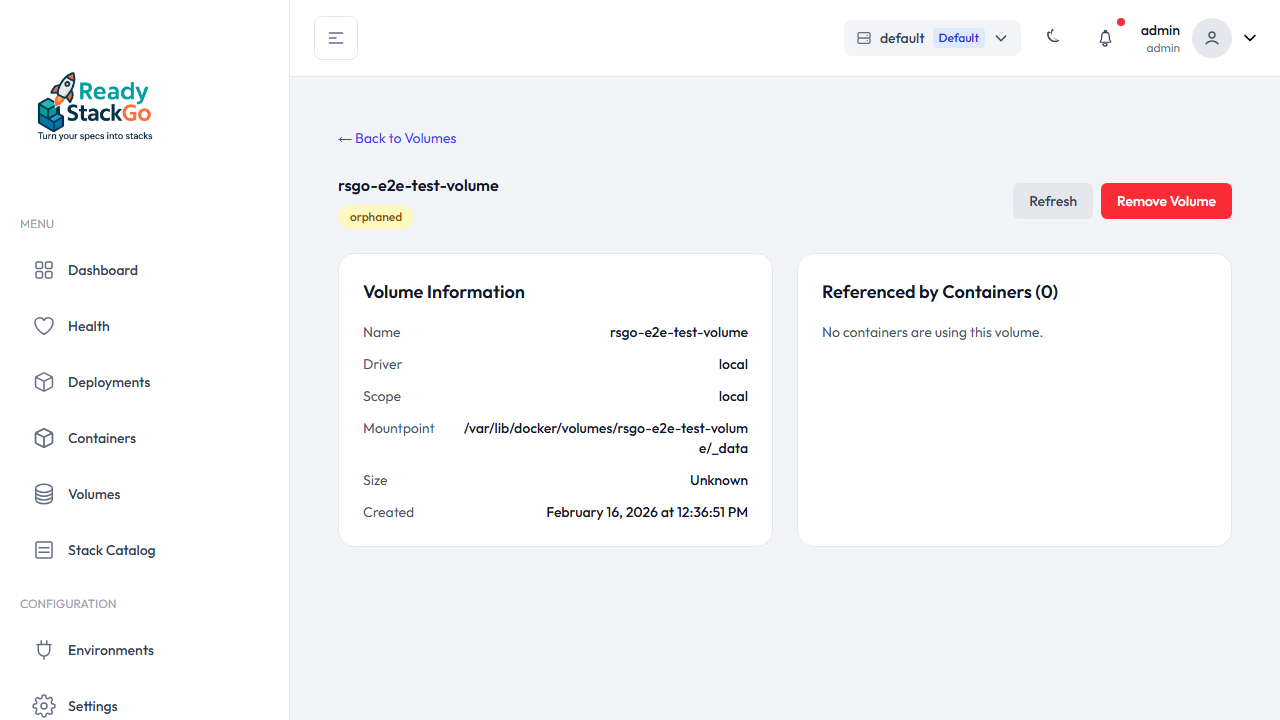
Step 3: View Volume Details
Section titled “Step 3: View Volume Details”Click on the volume name in the list to open the detail page. There you’ll find:
- Volume Information: Name, driver, scope, mountpoint, size and creation date
- Referenced by Containers: List of all containers using this volume
Step 4: Detect Orphaned Volumes
Section titled “Step 4: Detect Orphaned Volumes”Volumes without container references are automatically marked as orphaned (yellow badge). These volumes occupy storage space but are not used by any container.
![]()
Use the Orphaned only filter to show only orphaned volumes:

Step 5: Delete a Volume
Section titled “Step 5: Delete a Volume”Click Remove on a volume. An inline confirmation appears with Confirm and Cancel:
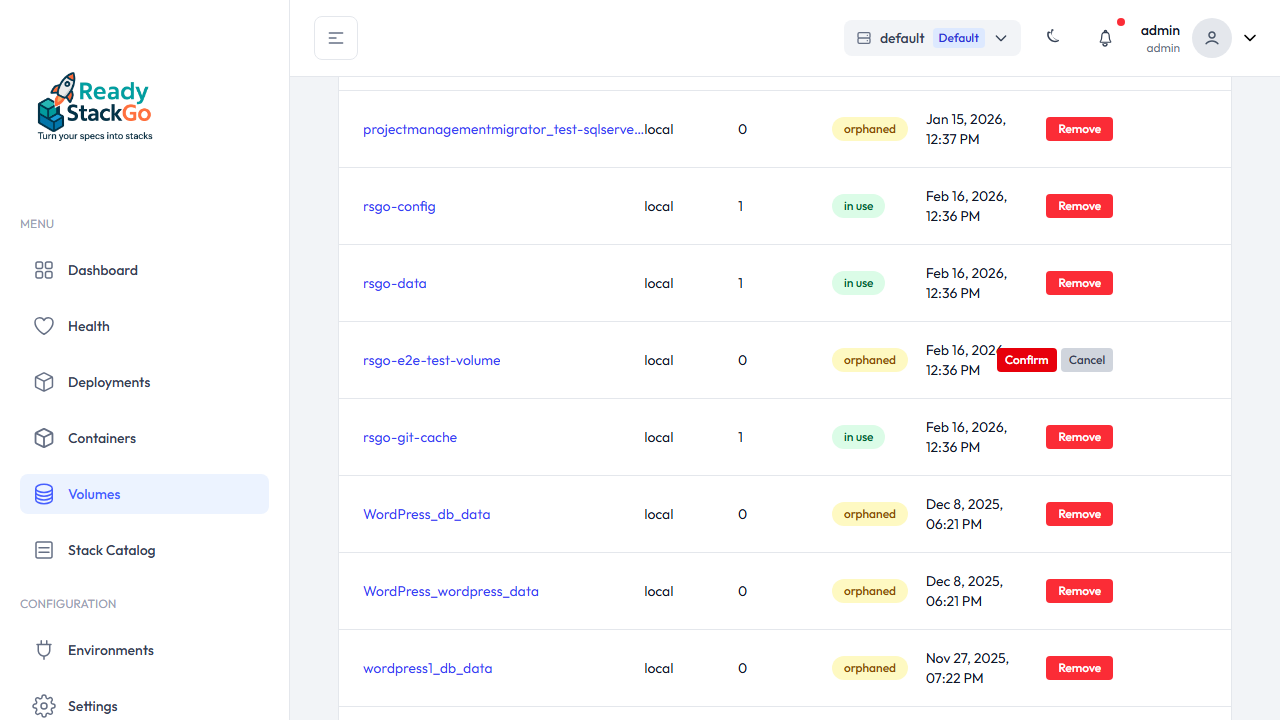
Click Confirm to permanently remove the volume.
Bulk Delete: If orphaned volumes exist, a Remove Orphaned button appears that lets you delete all orphaned volumes at once (after confirmation).
Deleting from the Detail Page
Section titled “Deleting from the Detail Page”On the detail page, you can delete a volume via the Remove Volume button. For volumes still referenced by containers, force mode is used.
API Reference
Section titled “API Reference”Volume management is also available via REST API:
| Endpoint | Method | Description |
|---|---|---|
/api/volumes?environment={id} | GET | List all volumes |
/api/volumes/{name}?environment={id} | GET | Get volume details |
/api/volumes?environment={id} | POST | Create a volume |
/api/volumes/{name}?environment={id}&force={bool} | DELETE | Delete a volume |
Related Links
Section titled “Related Links”- Stack Deployment - Deploy stacks
- CI/CD Integration - Automated deployments